

Introduction
The Elecrow CrowPanel 5.0″ is a fantastic little ESP32-S3 based touchscreen display — 800×480 resolution, capacitive touch, built-in WiFi and Bluetooth, and 8MB of PSRAM. It’s ideal for a wall-mounted Home Assistant control panel. But getting it running smoothly with ESPHome? That took some work.
This post walks through everything I learned building a fully-featured home control panel with climate control, Sonos/Spotify music playback with album art, lighting controls, and a screensaver — all running on ESPHome with LVGL.
What We’re Building
The finished panel has four pages navigated by a persistent header bar:
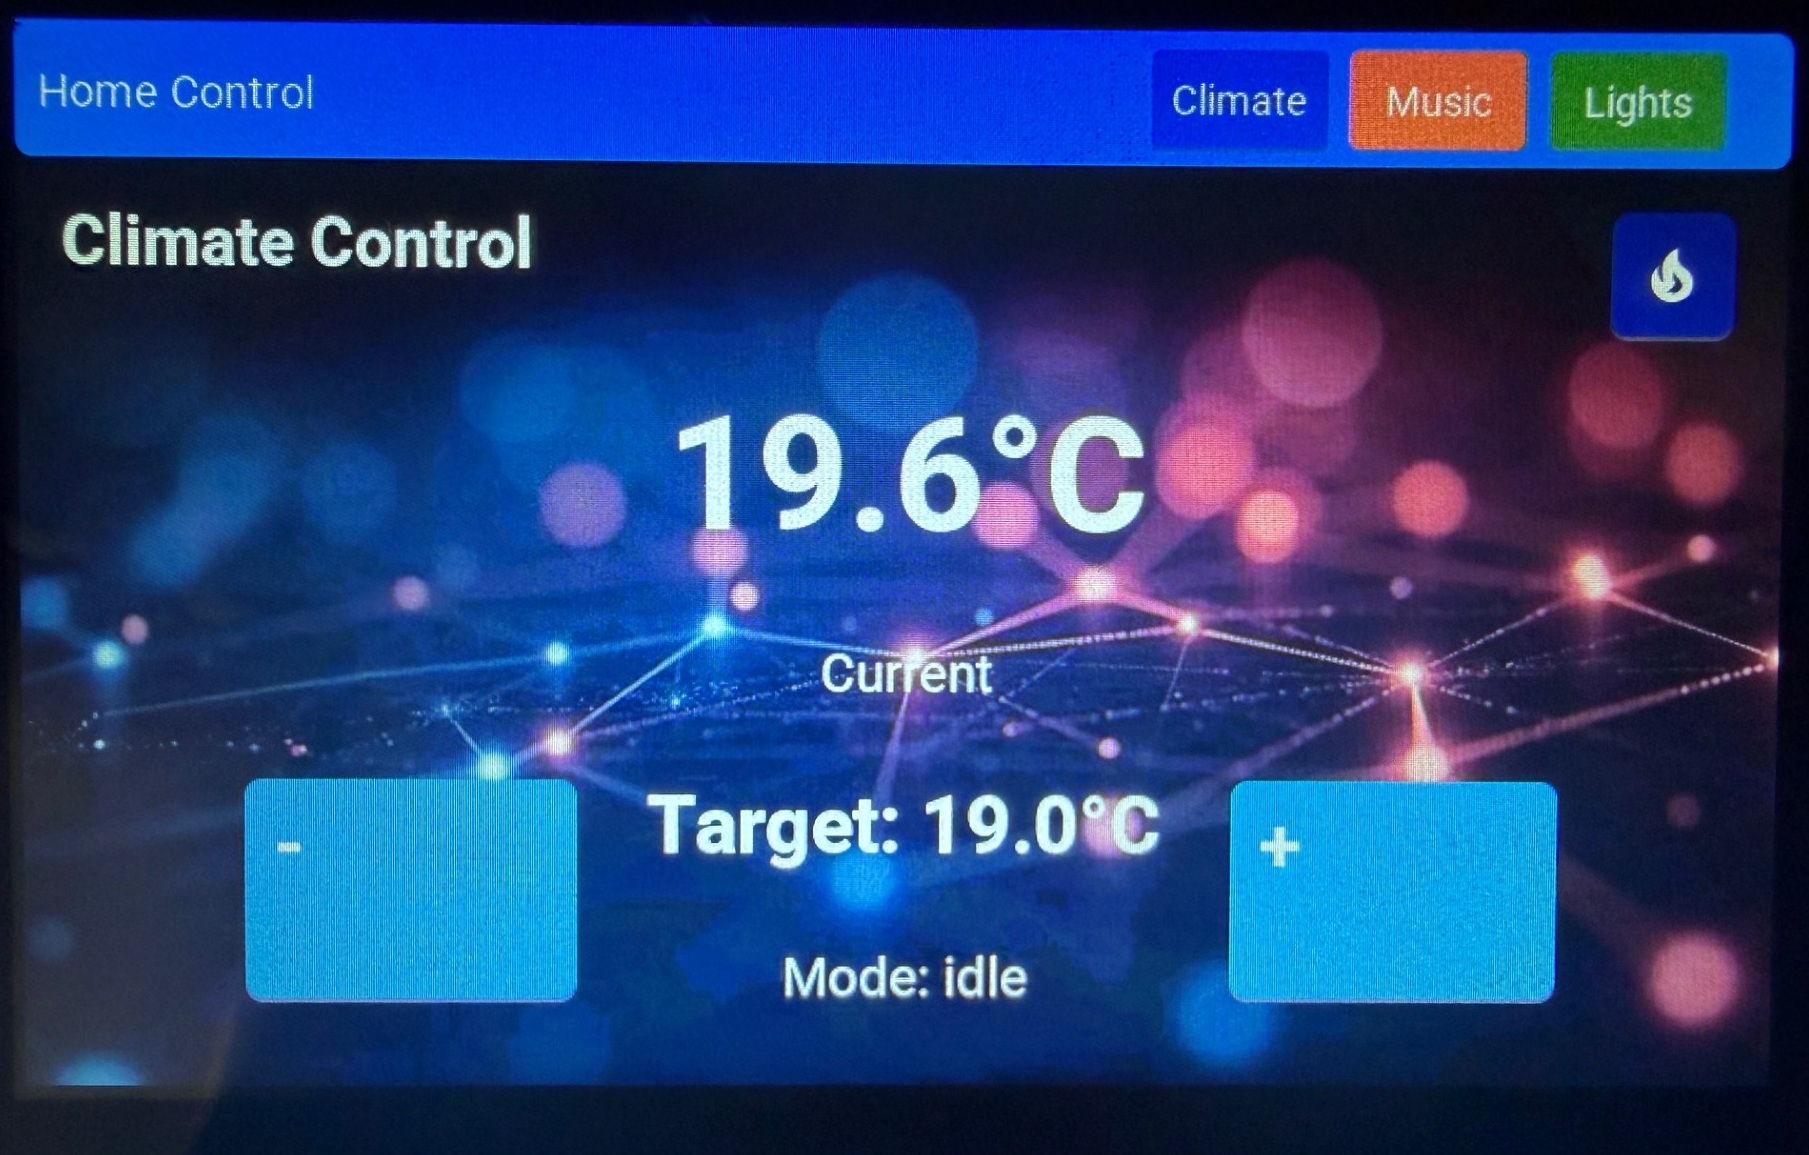
- Climate Control — Current and target temperature display, temperature adjustment buttons, boost toggle with a fire icon, and HVAC mode display from a thermostat entity.
- Music — Now-playing info with live album art from Sonos, transport controls (previous, play/pause, next), volume controls (up, down, mute), and six Spotify playlist preset buttons.
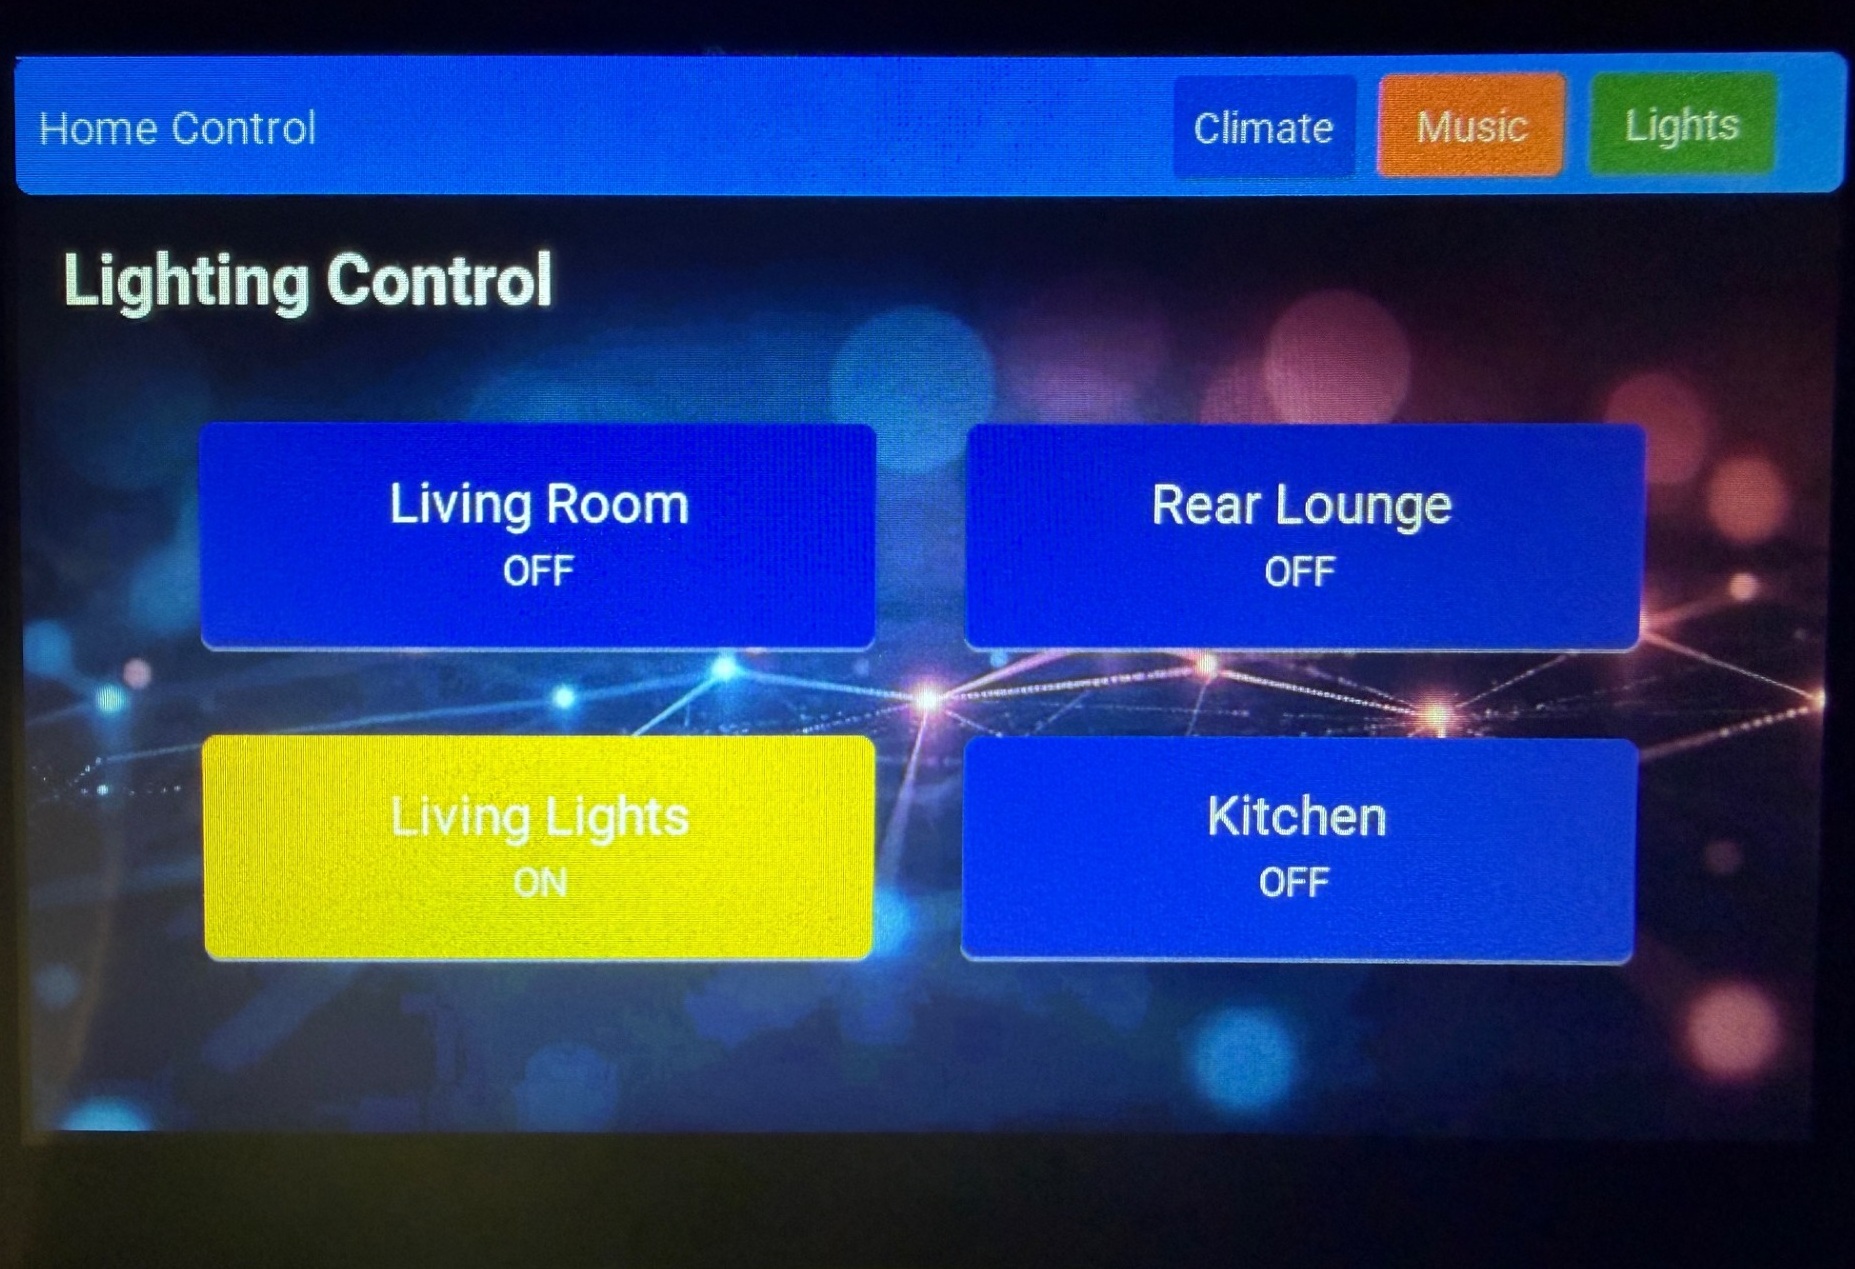
- Lighting — Four toggle buttons for different room lights with on/off state indicators and colour changes.
- Screensaver — After 60 seconds of inactivity, the display dims and shows a large red clock on a black background. Tap to wake and return to the last active page.
The Hardware
The CrowPanel 5.0″ uses an ESP32-S3-WROOM-1-N4R8 module with:
- Dual-core 240MHz processor
- 4MB Flash (important — not 16MB as some documentation suggests!)
- 8MB Octal PSRAM
- 800×480 RGB parallel TFT display
- GT911 capacitive touchscreen controller
- Backlight LED on GPIO2
- I2C on GPIO19 (SDA) / GPIO20 (SCL)
Important: Before assuming your flash size, verify it with esptool.py --chip esp32s3 --port COMX flash_id. I initially configured for 16MB flash based on documentation, which caused a boot loop that required a full flash erase to recover from.
The Flicker Problem (And How to Fix It)
This is the single biggest issue you’ll encounter with the CrowPanel and ESPHome, and it’s worth addressing first because it affects everything else.
The CrowPanel uses an RGB parallel display interface. Unlike SPI displays where the MCU pushes frames, an RGB parallel display has its own DMA controller that constantly reads the framebuffer from memory — in this case, PSRAM. The problem is that PSRAM has limited bandwidth, and when the ESP32’s CPU is also reading/writing PSRAM for general operations, the display DMA can’t keep up. The result is visible flickering and tearing.
The fix is a set of ESP-IDF SDK configuration options that optimise how the ESP32-S3 uses its memory bus:
esp32:
  board: esp32-s3-devkitc-1
  framework:
    type: esp-idf
    sdkconfig_options:
      CONFIG_ESP32S3_DEFAULT_CPU_FREQ_240: "y"
      CONFIG_ESP32S3_DATA_CACHE_64KB: "y"
      CONFIG_SPIRAM_FETCH_INSTRUCTIONS: y
      CONFIG_SPIRAM_RODATA: y
You also need to set the PSRAM bus mode in the PlatformIO options:
esphome:
  platformio_options:
    board_build.flash_mode: dio
    board_build.esp-idf.memory_type: qio_opi
    build_flags: "-DBOARD_HAS_PSRAM"
What these do:
- DATA_CACHE_64KB — Doubles the ESP32-S3’s data cache from 32KB to 64KB, reducing how often the CPU needs to access PSRAM directly.
- SPIRAM_FETCH_INSTRUCTIONS — Allows the CPU to execute code directly from PSRAM, freeing internal SRAM bandwidth.
- SPIRAM_RODATA — Stores read-only data in PSRAM rather than internal RAM, again freeing bandwidth for the display DMA.
- qio_opi memory type — Configures the PSRAM bus in octal QPI mode for maximum throughput.
I also found that the 5″ CrowPanel works best when you omit explicit hsync/vsync timing parameters and let ESPHome use its defaults — unlike the 7″ variant which needs specific timings from its display driver datasheet.
Critical: After changing sdkconfig_options, you must do a Clean Build (three-dot menu → Clean Build Files in ESPHome dashboard). These options are baked into the SDK configuration at compile time and won’t take effect from a cached build.
Display Configuration
The display section is fairly standard for the CrowPanel 5″:
display:
  - platform: rpi_dpi_rgb
    id: my_display
    auto_clear_enabled: false
    invert_colors: true
    update_interval: never
    data_pins:
      red: [45, 48, 47, 21, 14]
      green: [5, 6, 7, 15, 16, 4]
      blue: [8, 3, 46, 9, 1]
    de_pin: 40
    hsync_pin: 39
    vsync_pin: 41
    pclk_pin: 0
    pclk_inverted: true
    pclk_frequency: 12MHz
    color_order: RGB
    dimensions:
      width: 800
      height: 480
Key points: invert_colors: true is required for correct colour rendering on this panel. update_interval: never and auto_clear_enabled: false let LVGL manage display updates.
Event-Driven UI Updates (Not Polling)
My first attempt used a 1-second interval timer with a big lambda that polled every sensor and updated every label. This caused a subtle but infuriating problem: when adjusting the thermostat temperature from a browser, the panel would immediately reset it back because the interval lambda was continuously writing the old cached value.
The fix is to use event-driven callbacks — on_value for numeric sensors, on_state for binary sensors, and on_value for text sensors. The UI only updates when Home Assistant actually pushes a state change:
sensor:
  - platform: homeassistant
    id: thermostat_current_temp
    entity_id: climate.thermostat_2
    attribute: current_temperature
    on_value:
      then:
        - lambda: |-
            char buf[32];
            snprintf(buf, sizeof(buf), "%.1f°C", x);
            lv_label_set_text(id(current_temp_label), buf);
This also applies to the temperature adjustment buttons. Instead of using Jinja2 templates that ask HA to evaluate the current state (which can race with browser-based changes), use the locally cached sensor value:
on_click:
  - homeassistant.action:
      action: climate.set_temperature
      data:
        entity_id: climate.thermostat_2
      data_template:
        temperature: !lambda |-
          return to_string(id(thermostat_target_temp).state + 0.5);
LVGL Layout with Navigation
The UI uses LVGL pages with a persistent header bar in the top_layer (which renders above all pages). Three buttons in the header navigate between Climate, Music, and Lights pages:
lvgl:
  log_level: INFO
  color_depth: 16
  bg_color: 0x000000
  text_font: roboto24
  align: center

  top_layer:
    widgets:
      - obj:
          id: header_bar
          width: 800
          height: 60
          bg_color: 0x2196F3
          widgets:
            - label:
                text: "Home Control"
            - button:
                # Climate, Music, Lights buttons...
                on_click:
                  - lvgl.page.show: page_climate
I avoided using grey (0x757575) for “off” state colours on buttons — it caused noticeable flickering on this panel. A dark indigo (0x1A237E) works much better as an off-state colour and looks good against the dark background.
Sonos Music Control with Spotify Playlists
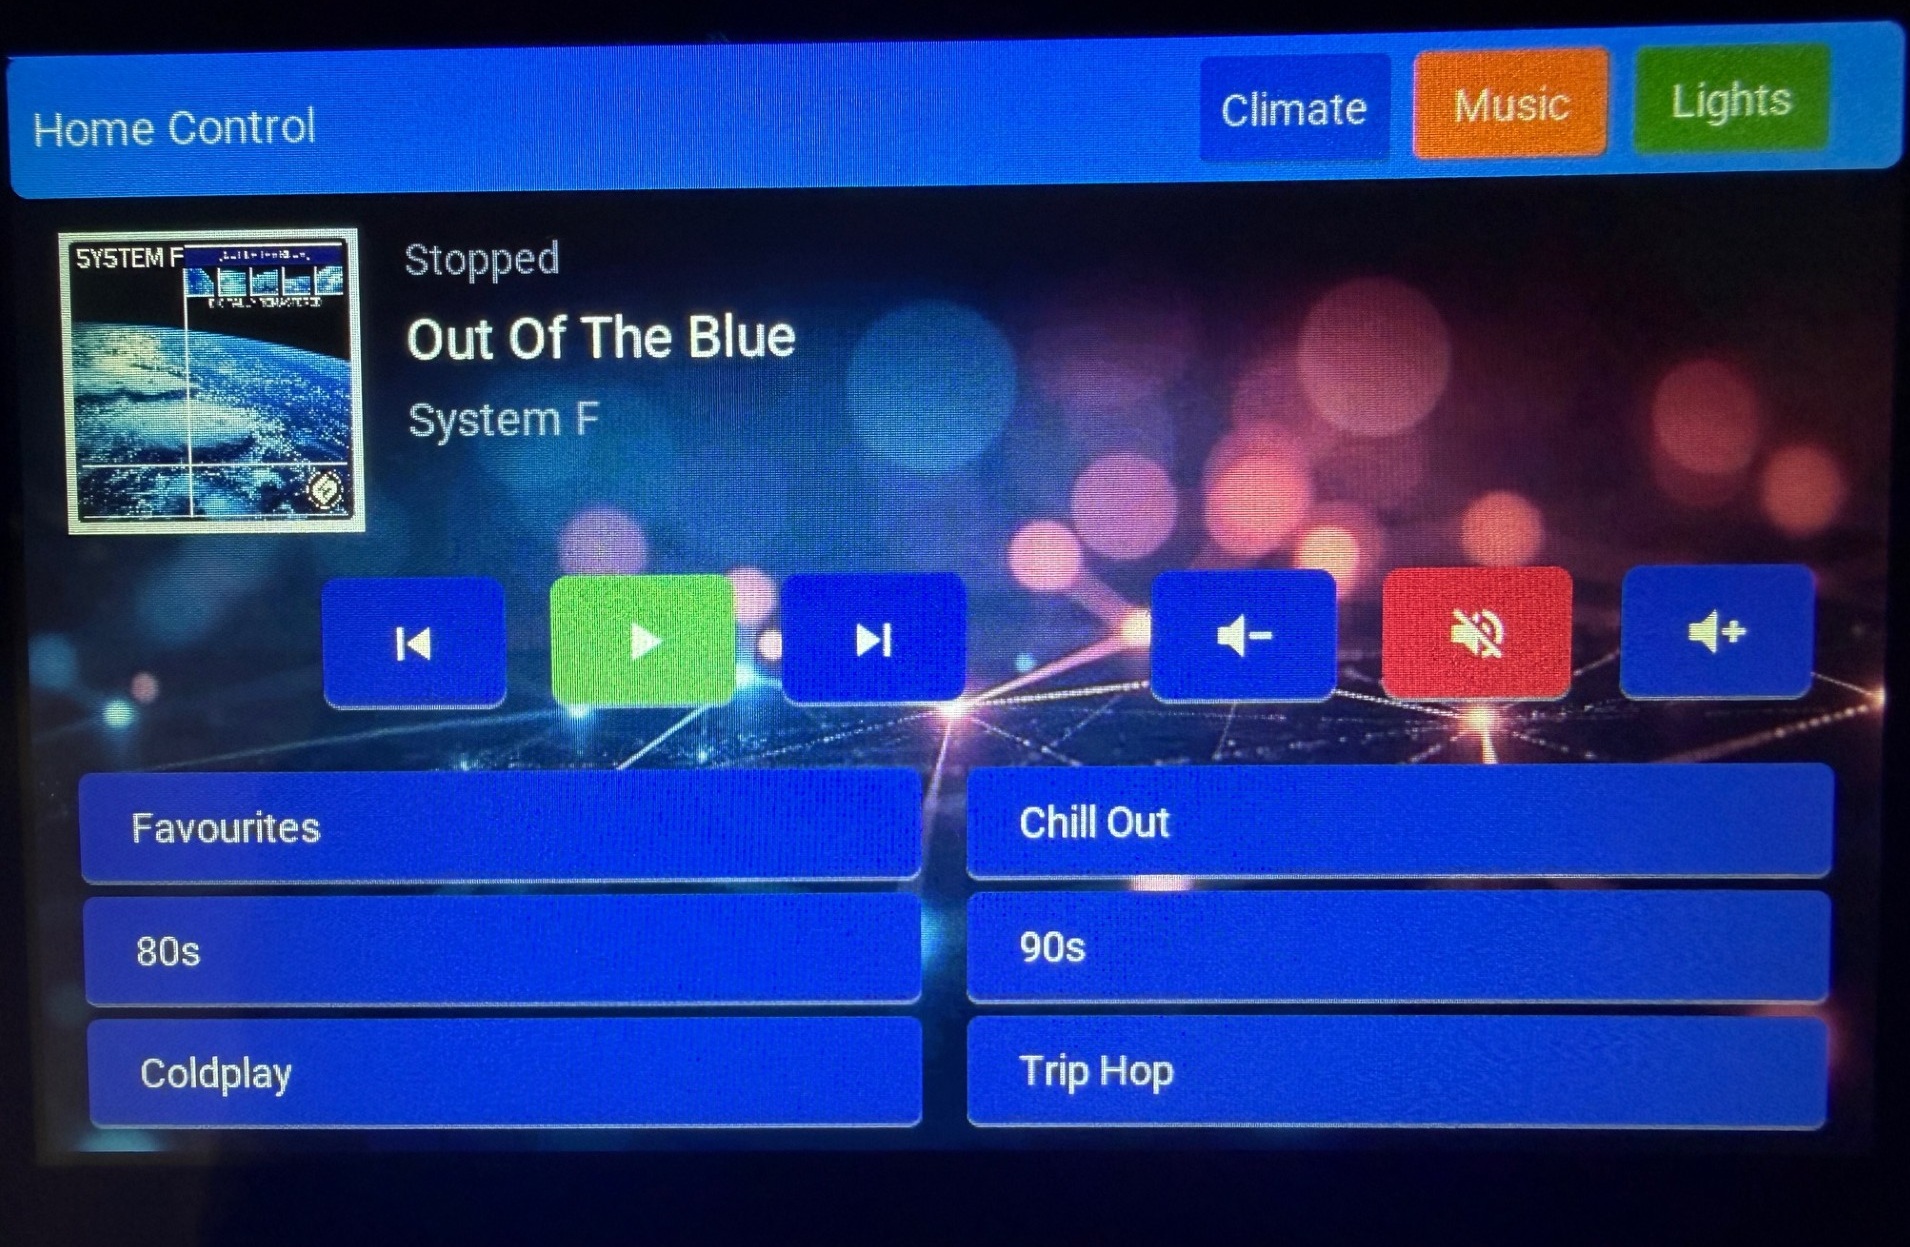
The music page tracks a Sonos speaker (media_player.living_room) with now-playing information, transport controls, and volume controls — all using Material Design Icons for clean button labels.
Six Spotify playlist buttons let you start music directly from the panel:
- button:
    bg_color: 0x1A237E
    radius: 6
    widgets:
      - label:
          text: "Chill Out"
    on_click:
      - homeassistant.action:
          action: media_player.play_media
          data:
            entity_id: media_player.living_room
            media_content_id: "spotify:playlist:4530EUiHb3H3OVxaOGRIan"
            media_content_type: "playlist"
You can grab playlist URIs from Spotify by right-clicking a playlist → Share → Copy link.
Album Art
ESPHome’s online_image component fetches album art dynamically. A text sensor watches the Sonos entity’s entity_picture attribute, and when the track changes, it constructs the full URL and triggers a download:
- platform: homeassistant
    id: media_player_art_url
    entity_id: media_player.living_room
    attribute: entity_picture
    on_value:
      then:
        - online_image.set_url:
            id: album_art
            url: !lambda |-
              std::string url = id(media_player_art_url).state;
              if (url.find("http") != 0) {
                return std::string("https://your-ha-url.com") + url;
              }
              return url;
        - component.update: album_art
Important: The Sonos media proxy returns JPEG images, so configure the online_image with format: JPEG. I initially had it set to PNG which caused “Incorrect PNG signature” errors. You also need an on_download_finished trigger to tell LVGL to re-render the image widget after the download completes.
Volume Mute Toggle
The mute button uses a Jinja2 template evaluated by HA to toggle the current mute state:
on_click:
  - homeassistant.action:
      action: media_player.volume_mute
      data:
        entity_id: media_player.your_speaker
      data_template:
        is_volume_muted: >-
          {{ not state_attr('media_player.your_speaker', 'is_volume_muted') }}
To provide visual feedback, a binary sensor tracks the is_volume_muted attribute and changes the mute button’s colour — red when muted, dark indigo when unmuted:
binary_sensor:
  - platform: homeassistant
    id: media_muted
    entity_id: media_player.your_speaker
    attribute: is_volume_muted
    on_state:
      then:
        - lambda: |-
            lv_obj_set_style_bg_color(id(mute_button),
              lv_color_hex(x ? 0xB71C1C : 0x1A237E), 0);
Background Image
With only 4MB flash, embedding a background image in the firmware isn’t practical (an 800×480 RGB565 image is ~750KB). Instead, the image loads at runtime via online_image into PSRAM:
online_image:
  - url: "https://your-ha-url.com/local/background.jpg"
    id: bg_image
    format: JPEG
    resize: 800x480
    type: RGB565
    update_interval: never
    on_download_finished:
      - lvgl.image.update:
          id: bg_image_climate
          src: bg_image
Place your background image in Home Assistant’s config/www/ folder. The device downloads it about 5 seconds after boot (to allow WiFi to connect first). Each LVGL page has an image widget that gets updated once the download finishes.
The page also sets a dark fallback bg_color so the display isn’t blank while the image loads.
Screensaver with Clock
After 60 seconds of no touch input, the display transitions to a screensaver — a black screen with a large dim red clock. Tapping anywhere wakes it back to the last active page.
This requires several components working together:
A global variable to track state:
globals:
  - id: screensaver_active
    type: bool
    initial_value: "false"
  - id: last_page
    type: int
    initial_value: "0"
Page tracking in the navigation buttons:
on_click:
  - globals.set:
      id: last_page
      value: "1"  # 0=Climate, 1=Music, 2=Lights
  - lvgl.page.show: page_music
Idle detection using LVGL’s built-in idle timer:
interval:
  - interval: 1s
    then:
      # Update clock while screensaver is active
      - if:
          condition:
            lambda: "return id(screensaver_active);"
          then:
            - lambda: |-
                auto time = id(ha_time).now();
                if (time.is_valid()) {
                  char buf[16];
                  snprintf(buf, sizeof(buf), "%02d:%02d", time.hour, time.minute);
                  lv_label_set_text(id(screensaver_clock), buf);
                }
      # Activate screensaver after 60 seconds idle
      - if:
          condition:
            and:
              - lambda: "return !id(screensaver_active);"
              - lvgl.is_idle:
                  timeout: 60s
          then:
            - globals.set:
                id: screensaver_active
                value: "true"
            - lvgl.widget.hide: header_bar
            - light.turn_on:
                id: backlight
                brightness: 30%
                transition_length: 2s
            - lvgl.page.show: page_screensaver
Touch-to-wake with page restoration:
touchscreen:
  - platform: gt911
    on_touch:
      - if:
          condition:
            lambda: "return id(screensaver_active);"
          then:
            - globals.set:
                id: screensaver_active
                value: "false"
            - light.turn_on:
                id: backlight
                brightness: 100%
            - lvgl.widget.show: header_bar
            # Restore last active page
            - if:
                condition:
                  lambda: "return id(last_page) == 0;"
                then:
                  - lvgl.page.show: page_climate
            # ... etc for other pages
The clock uses a dedicated 160px font with only digit and colon glyphs — this keeps the flash footprint minimal while filling about two-thirds of the screen. The header bar is hidden via lvgl.widget.hide when entering the screensaver and restored on wake.
Material Design Icons
Instead of text characters for buttons (“<<“, “>”, “>>”), the panel uses Material Design Icons loaded from the MDI webfont. ESPHome downloads the font at compile time — you only include the specific glyphs you need:
font:
  - file: "https://github.com/Templarian/MaterialDesign-Webfont/raw/master/fonts/materialdesignicons-webfont.ttf"
    id: mdi_transport
    size: 28
    bpp: 4
    glyphs:
      - "\U000F04AE"  # mdi:skip-previous
      - "\U000F040A"  # mdi:play
      - "\U000F03E4"  # mdi:pause
      - "\U000F04AD"  # mdi:skip-next
      - "\U000F075D"  # mdi:volume-plus
      - "\U000F075E"  # mdi:volume-minus
      - "\U000F0581"  # mdi:volume-off
You can find glyph codes at Pictogrammers MDI Library.
Lessons Learned
- Verify your flash size. Don’t trust documentation — use
esptool.py flash_id. Setting the wrong flash size causes unrecoverable boot loops that require a USB erase. - The PSRAM bandwidth fix is non-negotiable. Without the
sdkconfig_optionsandqio_opimemory type, the display will flicker. This is the single most important configuration detail. - Use event-driven updates, not polling. A 1-second interval timer updating all labels creates race conditions with other HA clients. Use
on_valueandon_statecallbacks instead. - Avoid grey for off-state buttons. Mid-tone greys cause visible flicker on this display. Dark blues and indigos work much better.
- online_image format must match the actual file. If the server returns JPEG, configure
format: JPEG. The “Incorrect PNG signature” error is a dead giveaway. - LVGL image widgets don’t auto-refresh. After downloading an online image, you must explicitly trigger
lvgl.image.updateto tell the widget to re-render. - The top_layer persists across pages. If you put a header bar in
top_layer, remember to hide it for things like screensavers. - Clean Build after SDK config changes. The
sdkconfig_optionsare baked in at compile time. Cached builds won’t pick up changes.
The Full Configuration
The complete YAML configuration is quite long (1000+ lines), so I’ve made it available as a downloadable file. It includes all the features described above: climate control, Sonos music with Spotify playlists and album art, four-zone lighting control, background image, and the screensaver with clock.
You’ll need to adjust the following for your setup:
- Home Assistant entity IDs for your thermostat, media player, and lights
- Your Home Assistant URL (for album art and background image)
- Your Spotify playlist URIs
- WiFi credentials in your
secrets.yaml - API encryption key and OTA password
- Roboto font files in a
fonts/folder alongside the YAML - A background image in your HA
config/www/folder
What’s Next
There’s plenty more that could be added — weather forecasts, calendar events, doorbell camera feeds, or even voice assistant integration using the ESP32-S3’s microphone support. The CrowPanel is a capable little device once you get past the initial configuration hurdles, and ESPHome’s LVGL support makes it genuinely useful as a permanent wall-mounted control panel.