

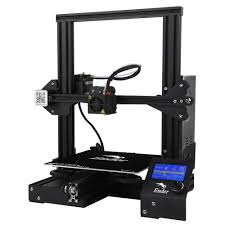
I have recently started dabbling with 3D Printing – the
Out of the box, it should print just fine if you have set it up correctly it should print OK, but many people have found the print bed is not 100% flat. There are many fixes for this, some swear by glass plates or mirror tiles, but I didn’t have much luck printing on glass, I just couldn’t get prints to stick! I opted for a PEI sheet instead which has worked flawlessly for me
I decided to go for an auto bed levelling solution, and after much reading decided on the BLtouch. My first attempt was with a cheap Chinese clone (triangle labs) which was too inaccurate to use, so be warned!
Ok, so out of the box, the Ender 3 doesn’t support the BLtouch, it also doesn’t contain a bootloader required for flashing new firmware, so we are going to need a couple of extra bits to get us going. (See, I said it was DIY!)
You will need an Arduino UNO and some cables and what is called a ‘pin 27 connector‘
I followed this excellent tutorial from Teaching Tech here:
HOWEVER I did not install the TH3D firmware, I used vanilla Marlin instead (see below)
Once you have the bootloader installed, time to flash marlin and set up the bltouch
Now what these two tutorials
StartCode
M117 Preparing....    ; Nozzle clean message
M82 ;absolute extrusion mode
G90 ;absolute xyz mode
M140 S{material_bed_temperature_layer_0}   ; set bed temp

M107                  ; Turn layer fan off
G28                   ; Home X/Y/Z axis
G0 X0 Y0 Z20 F9000    ; Move up 20mm for heating


M104 S170 ; set extruder temp
M190 S{material_bed_temperature_layer_0}   ; wait for bed temp
M109 S170 ; wait for extruder temp

G92 E0                ; Zero extruder

G29     ;Probe the bed
M420 S1 ; bed level state ON
M104 S{material_print_temperature_layer_0} ; set extruder temp
M109 S{material_print_temperature_layer_0} ; wait for extruder temp
; Level Bed
G0 X1 Z0.1 F9000      ; Move up 0.1mm
G0 Y10 F500           ; Move 10mm to get rid of material
G0 Z1 F9000           ; Move up
G0 Y110 F9000         ; Move to line start
G0 Z0.2 F9000         ; Move down

G1 Y20 E25 F500       ; Extrude 25mm filament over 90mm Y axis
G1 Y10 F500           ; Move 10mm without extracting
G92 E0                ; Reset extruder
G1 E-1 F1400          ; Retract 1mm filament
M117 Printing....     ; Printing message
End Code
; Ender 3 Custom End G-code to present print
G91
G1 F1800 E-3
G1 E-5 F1400          ; Retract 5mm filament
G1 F3000 Z10
G90
G1 X0 Y220 F1000 ; prepare for part removal
M106 S0 ; turn off cooling fan
M104 S0 ; turn off extruder
M140 S0 ; turn off bed
M84 ; disable motors
M117 printed @ 1mm
That’s pretty much it, you should now be printing with no adhesion problems at all!