
Today I got around to setting up a kickstart server to allow my Raspberry Pi’s to PXE boot. This has the advantage of reducing reliance (and wear and tear!) on SD cards. (Note, this only works for wired connections, not wifi)
This is fairly straightforwards but does require modification of the bootloader on your PI.
Things you will need:
Micro SD Card (For initial setup)
Ubuntu Server (I run 16.04 in a VM)
It’s also useful to have the Pi hooked up to a screen so you can see the boot process! (I use these HDMI leads)
Preparing the Pi
Use the Raspberry Pi Imager tool to flash a copy of Raspbian to the SD card. if you are running headless, create an empty file called ssh and place it in the boot volume before you boot the pi – this will allow you to SSH into your Pi once it has booted up.
SSH into your Pi (or use the local terminal) and the first thing we will do is update the Pi:
sudo apt-get update && sudo apt-get upgrade
Nest, we need to get the latest BETA firmware image. Go to https://github.com/raspberrypi/rpi-eeprom/raw/master/firmware/beta/ and get the filename of the most recent beta, e.g. “pieeprom-2020-08-31”
Now enter these commands, making sure the first line reflects the most recent beta:
PI_EEPROM_VERSION=pieeprom-2020-08-31
wget https://github.com/raspberrypi/rpi-eeprom/raw/master/firmware/beta/${PI_EEPROM_VERSION}.bin
sudo rpi-eeprom-config ${PI_EEPROM_VERSION}.bin > bootconf.txt
sed -i 's/BOOT_ORDER=.*/BOOT_ORDER=0x21/g' bootconf.txt
sudo rpi-eeprom-config --out ${PI_EEPROM_VERSION}-netboot.bin --config bootconf.txt ${PI_EEPROM_VERSION}.bin
sudo rpi-eeprom-update -d -f ./${PI_EEPROM_VERSION}-netboot.bin
cat /proc/cpuinfo | grep Serial | awk -F ': ' '{print $2}'
ip addr show eth0 | grep ether | awk '{print $2}'
The last two lines will output your serial number and MAC address, we will need to record these for later steps. Note, you can discard the first 1 and zeros from the serial number nad just keep the last 8 or 9 characters. For example, mine looks like “1000000064f7504e” so I would use “64f7504e” as the serial number
Reboot the Pi once, then shut it down and remove the SD card.
Preparing the Kickstart Server
Install an Ubuntu VM, I run mine in Hyper V on my Windows 10 machine but you can use any hypervisor you like. Note, this will need to be running all the time your PI is on, as the filesystem will be stored on this server. Maybe you have an old laptop lying around that can be repurposed for this – it doesn’t need to be powerful, my VM has 1 core and 512Mb ram and is fine
Once you have ubuntu installed, we get an elevated shell and update and install the required packages:
sudo bash
apt update
apt install -y nfs-kernel-server dnsmasq kpartx unzip
Next, we download the latest Pi image and create the necessary folders:
wget -O raspbian_lite_latest.zip https://downloads.raspberrypi.org/raspbian_lite_latest
unzip raspbian_lite_latest.zip
kpartx -a -v *.img
mkdir {bootmnt,rootmnt}
mount /dev/mapper/loop0p1 bootmnt/
mount /dev/mapper/loop0p2 rootmnt/
Run the following command and replace it with your Raspberry Pi’s serial (last 8 or 9 characters), MAC Address and the IP Address of your Ubuntu VM. This will create the necessary filesystem structure and copy the Raspberry Pi OS from the previous step to be able to boot the Raspberry Pi over the network:
PI_SERIAL=abcdefgh
PI_MAC=dc:a6:ab:cd:ef:gh
KICKSTART_IP=192.168.30.176
mkdir -p /srv/nfs/rpi4-${PI_SERIAL}
mkdir -p /srv/tftpboot/${PI_SERIAL}
cp -a rootmnt/* /srv/nfs/rpi4-${PI_SERIAL}/
cp -a bootmnt/* /srv/nfs/rpi4-${PI_SERIAL}/boot/
Next, we need to replace the default firmware files with the latest version by running the following commands:
rm /srv/nfs/rpi4-${PI_SERIAL}/boot/start4.elf
rm /srv/nfs/rpi4-${PI_SERIAL}/boot/fixup4.dat
wget https://github.com/Hexxeh/rpi-firmware/raw/stable/start4.elf -P /srv/nfs/rpi4-${PI_SERIAL}/boot/
wget https://github.com/Hexxeh/rpi-firmware/raw/stable/fixup4.dat -P /srv/nfs/rpi4-${PI_SERIAL}/boot/
Next we setup the NFS export and dnsmasq configuration to allow the Raspberry Pi to mount the images over the network. If you have an existing DHCP server (And how doesn’t?) and want to use it, specify your network broadcast address and “proxy” keyword as shown in the example below (Most home routers will likely be 192.168.0.255 or 192.168.1.255, this is not the IP of your router, but the broadcast address which is usually the last address in your IP range)
echo "/srv/nfs/rpi4-${PI_SERIAL}/boot /srv/tftpboot/${PI_SERIAL} none defaults,bind 0 0" >> /etc/fstab
echo "/srv/nfs/rpi4-${PI_SERIAL} *(rw,sync,no_subtree_check,no_root_squash)" >> /etc/exports
cat > /etc/dnsmasq.conf << EOF
dhcp-range=192.168.0.255,proxy
log-dhcp
enable-tftp
tftp-root=/srv/tftpboot
pxe-service=0,"Raspberry Pi Boot"
EOF
mount /srv/tftpboot/${PI_SERIAL}/
In addition, to enable SSH and clearing the fstab file so it will not look for filesystem on the SD Card, the cmdline.txt is updated so Raspberry Pi knows how to reach our NFS share
touch /srv/nfs/rpi4-${PI_SERIAL}/boot/ssh
sed -i /UUID/d /srv/nfs/rpi4-${PI_SERIAL}/etc/fstab
echo "console=serial0,115200 console=tty root=/dev/nfs nfsroot=${KICKSTART_IP}:/srv/nfs/rpi4-${PI_SERIAL},vers=3 rw ip=dhcp rootwait elevator=deadline" > /srv/nfs/rpi4-${PI_SERIAL}/boot/cmdline.txt
Now we enable the required services:
systemctl enable dnsmasq
systemctl enable rpcbind
systemctl enable nfs-server
systemctl start dnsmasq
systemctl start rpcbind
systemctl start nfs-server
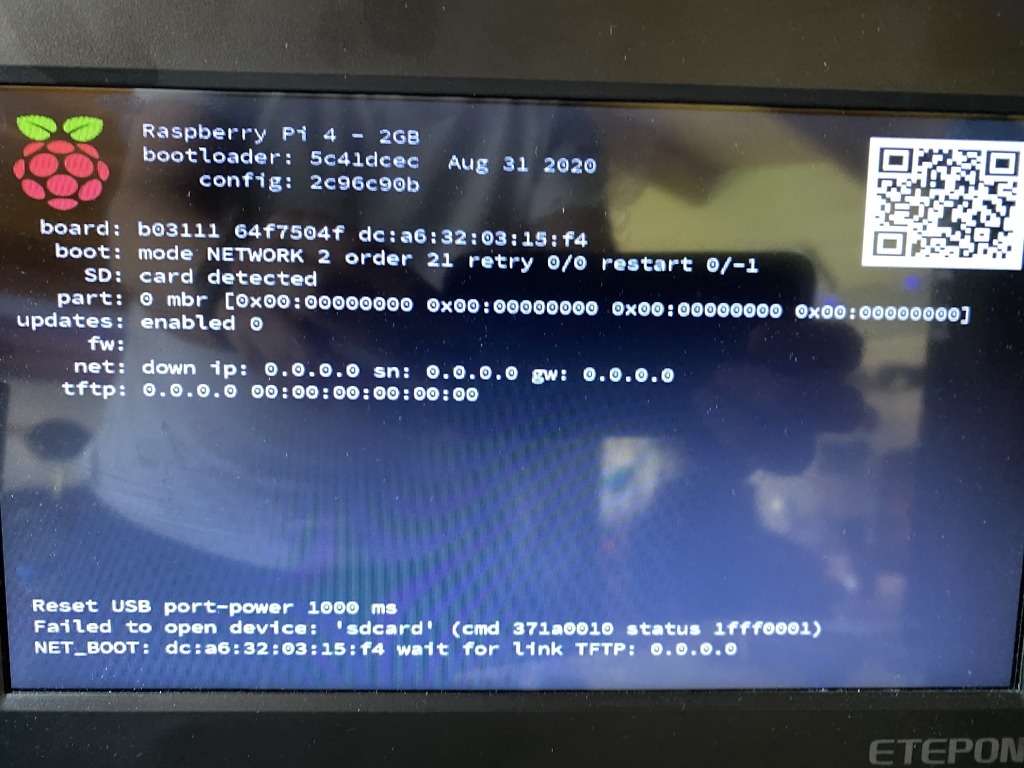
we are now ready to power on our Raspberry Pi (without the SD card!) and you should see Pi OS boot over the network. You can also confirm things are working by tailing the logs of /var/log/syslog on your Ubuntu system. (tail -f /var/log/syslog)
When the Pi boots, it will load up the PXE boot, connect, and then briefly appear to reset. You will then get the multicoloured start screen and booting should continue.