
Goal: Have a working, responsive WordPress Site running on a raspberry Pi
Required items:
One Raspberry Pi
SD Card with Raspbian installed
SSH access into your Pi (if you are running headerless) or a terminal with root access
An internet connection
Lots of Coffee.
First steps…
To get WordPress working on your Raspberry Pi, we will need to install a few things:
Im going to go with Apache as the web server, as it is the one I am most familiar with – others are available such as Nginx and lighttpd which may offer slightly better performance..
So lets start, if you are logged in as user pi or a non root account, first thing to do is to enter the following on the command line
Sudo bash
To give us root access to the system.
Next we install Apache:
apt-get install apache2
Now the mysql server that will hold the database for WordPress..
apt-get install mysql-server mysql-client
Enter a password for the MySQL root user when prompted:

Repeat password when prompted
Now install the required PHP modules
apt-get install php5 php5-mysql php5-curl php5-gd php5-idn php-pear php5-imagick php5-imap php5-mcrypt php5-memcache php5-pspell php5-recode php5-snmp php5-sqlite php5-tidy php5-xmlrpc php5-xsl
Next, change to the web root directory:
cd /var/www/html
And download wordpress
wget http://wordpress.org/latest.zip
Unpack it and copy it to the correct place:
unzip latest.zip
cp -rf wordpress/* /var/www/html/
Now that WordPress content is in the right place, we need to configure our database. We’re doing to create a new database and user:
First let’s create our WordPress database.
mysql -u root -p
When prompted enter the password you create earlier. Once logged in, run the commands below to create our first database named wordpress.
CREATE DATABASE wordpress;
CREATE USER 'wpuser'@'localhost' IDENTIFIED BY 'myPassword';
GRANT ALL PRIVILEGES ON wordpress.* TO 'wpuser'@'localhost';
replace ‘myPassword’ with a password of your choice.
Exit
Now to set up WordPress itself..
First we need a config file, so we will use the example shipped with WordPress..
cp wp-config-sample.php wp-config.php
Now edit it:
nano wp-config.php
Change the values for yours that you set earlier, eg:
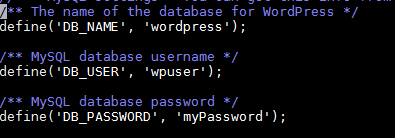
Press CTRL+x and answer ‘y’ to save the file
Now enter:
chown -R www-data:www-data *
chown www-data:www-data .htaccess
rm index.html
This makes sure the web service can correctly access the files.
Now reload the web server:
service apache2 reload
Open a browser and browse to the ip or host name of your PI, you should see something like this:
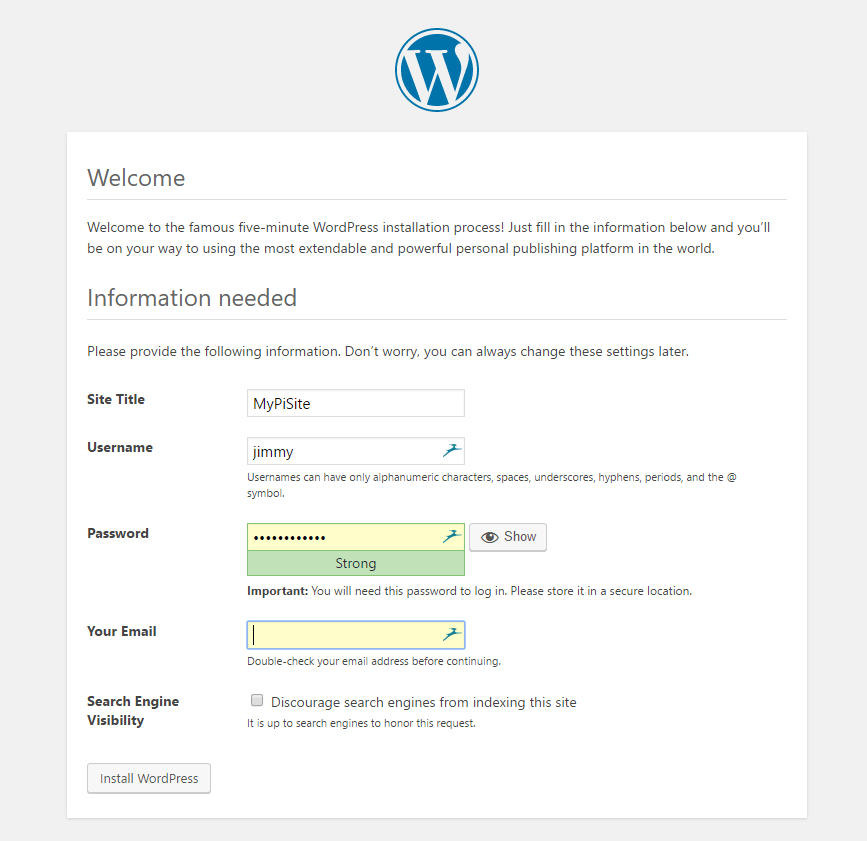
Fill in the details you want, taking care to note the password down and click install… If all went well, you will be presented with the WordPress admin page.
Now I always like to use this plugin to improve the performance of my site.
Download and activate the W3 total cache plugin:
https://en-gb.wordpress.org/plugins/w3-total-cache/
Upload the plugin through the wordpress plugin manager and activate it
(If you receive and error like The uploaded file exceeds the upload_max_filesize directive in php.ini -edit the file /etc/php5/apache2/php.ini and change the max_upload_filesize and post_max_size to something sensible, e.g. 10mb.)
Now go to the General settings for the Plugin and enable the following options:
Page Cache – Enabled, Disk Enhanced
Minify
OpCode Cache

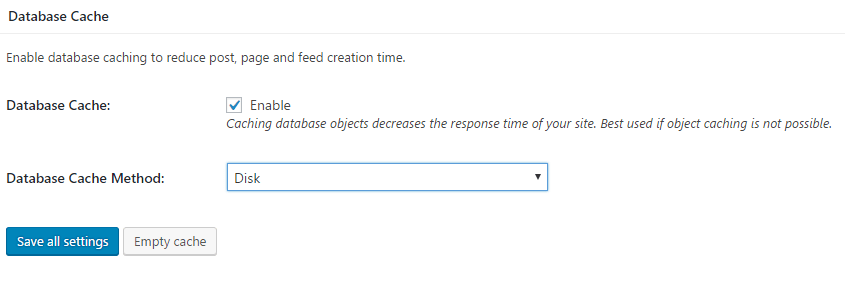
Database Cache
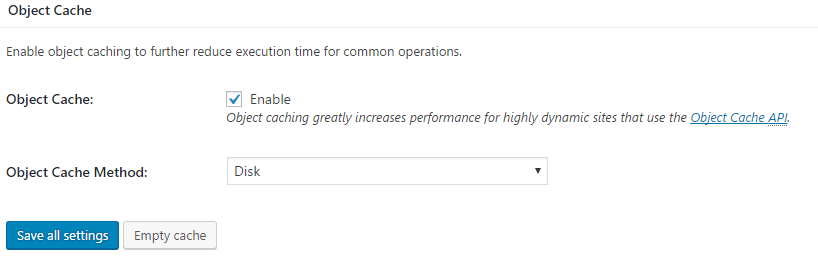
Object Cache
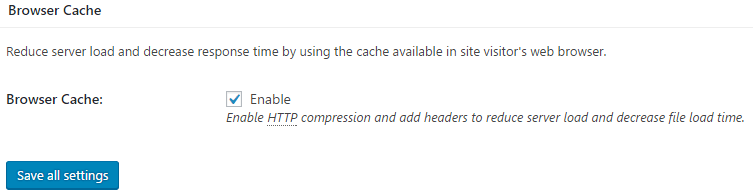
Browser Cache
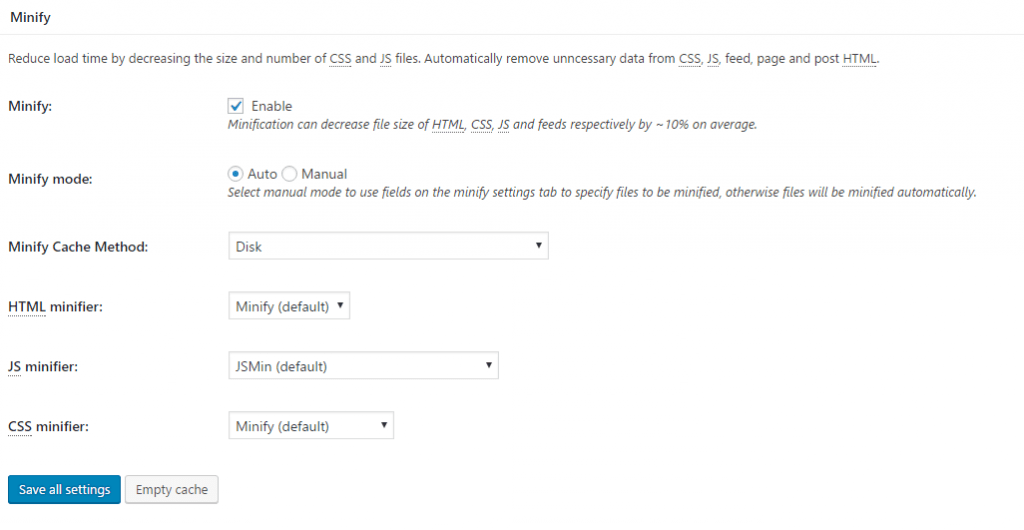
Next, Select MINIFY from the performance menu and choose the following:
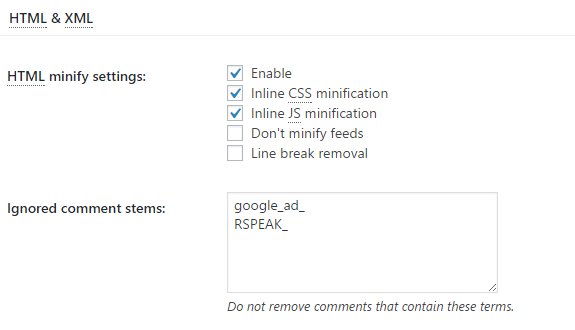
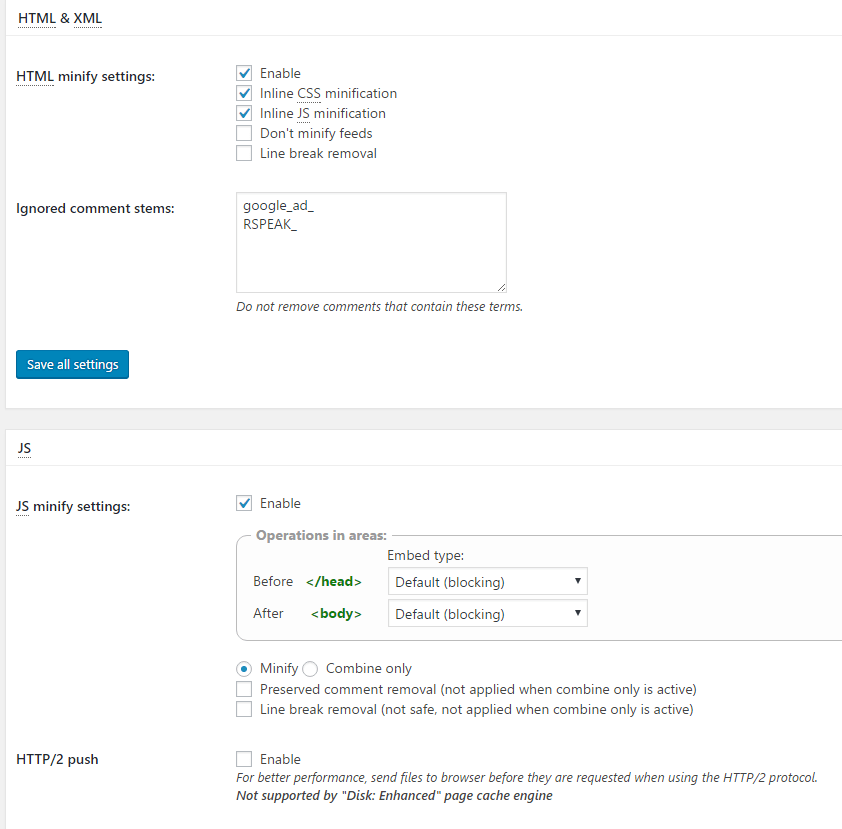
Note – Some themes don’t work well with JS minification, if you have issues with your theme, disable this setting
Now go to Browser Cache settings page and choose the following
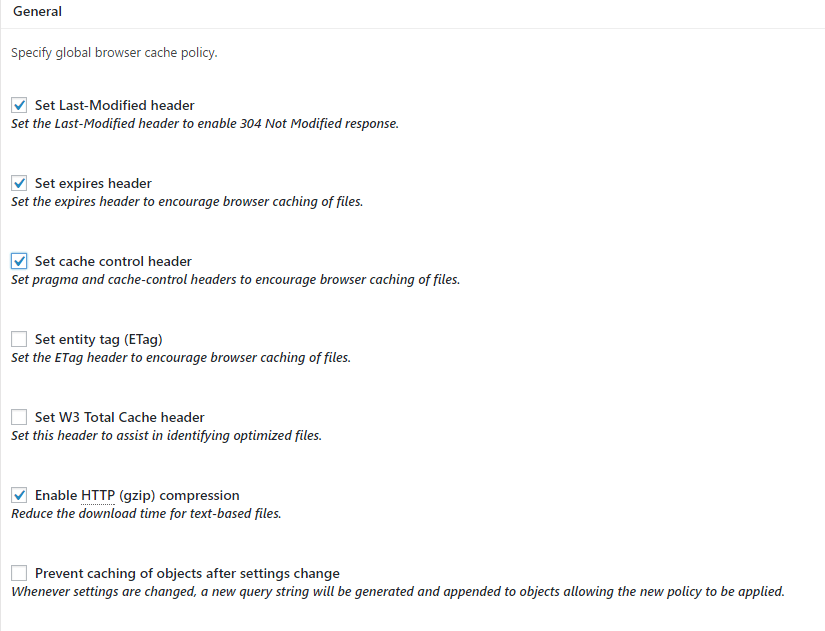
Save all the settings and flush the caches as direct by the status messages
Many of these settings can be tweaked, and for even more performance consider putting your web root dir on an NFS share if you have a home NAS that supports NFS.
If your site is to be on the internet, and you have it presented on a public domain name using a service such as no-ip.com or other dynamic dns provider, it’s worth installing the Jetpack plugin and enabling their ‘Photon’ module which will cache all your images on their content delivery network, meaning all images served to visitors of your site will be provided by their servers, not your Pi, this should be a big boost for you!
There are many other things that could be done, if you have a favourite, please leave it in the comments below